Programmatic Navigation with NavigationLink on an Apple Watch
How to navigate based on custom user interactions
by
 Lou Franco
In the previous article we set up a simple NavigationLink with this code.
struct WorkoutView: View {
  var body: some View {
    List {
      ForEach(workouts) { workout in
        NavigationLink(destination: WorkoutSetupView(workout: workout)) {
          WorkoutCellView(workout: workout)
        }
      }
    }
  }
}
When you tap the cell, it will bring up WorkoutSetupView, and there will be a back button at the top left of the view. If you tap that, it goes back to the calling view.
But, sometimes, there is a reason to send the user back to the calling view based on other things they do. In UIKit, we'd call dismiss, but in SwiftUI, we don't call methods on views to change them, we change state and let the view get re-rendered.
Use state to change how views are rendered
Whenever you are interacting with a view built with SwiftUI, the underlying View tree is encoded to include all of the possible states. The view has bindings (like the @State variable) that help the rendering engine traverse the tree to determine what is actually shown.
But, then, what is going on with NavigationLink? When you tap the link, some state is changing that is causing a re-render. But we don't have any state variables that say when each view is shown. How does this work?
In this case, the answer is simple. The state lives inside NavigationLink, which manages it. If you are ok with the default behavior, there's nothing more you need to do.
But, let's change the setup view to have a back button on the view:
struct WorkoutSetupView: View {
  let workout: Workout
  let action: () -> Void

  var body: some View {
    VStack {
      Text(workout.name)
      Button("Back", action: action)
    }
  }
}
When we construct the view, we'll pass in an action for the back button. But, what do we do in the action closure to go back?
In UIKit, presentation and dismissal were functions you call on the ViewController. The back action would simply call popViewController. But, in SwiftUI, you need to think about changing a state that changes the view tree, not mutating the view hierarchy directly with a method call.
In the case of NavigationLink, we can pass in our own binding to use instead of the internal one.
How to pass presentation state to NavigationLink
There are two ways NavigationLink allows you to pass in a binding. For simple cases, there's an isActive parameter which is a binding to a Bool. If you tap the link or back button, it will be set automatically, but you can also set the Bool and that will programmatically present or dismiss the view.
But, it can be tricky. Here's an incorrect implementation:
struct WorkoutView: View {
  @State var showingSetup = false

  var body: some View {
    List {
      ForEach(workouts) { workout in
        NavigationLink(destination: WorkoutSetupView(workout: workout, action: {
          self.showingSetup = false
        }), isActive: $showingSetup) {
          WorkoutCellView(workout: workout)
        }
      }
    }
  }
}
Can you see the problem? Here's what it looks like when you preview it.
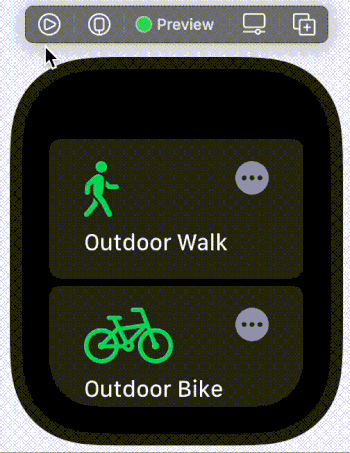
The problem is that there are two NavigationLinks on the screen and two WorkoutSetupView values in the View tree. But, they are both sharing the same showingSetup value, so they both show when it becomes true.
A simple solution is to make sure you have a state variable for each workout, like:
@State var showingSetup: [Bool] = workouts.map { _ in false }
Now, instead of looping over the workouts, we use a range from 0..<workouts.count so we have an index to look up a workout and state to use.
struct WorkoutView: View {
  @State var showingSetup: [Bool] = workouts.map { _ in false }

  var body: some View {
    List {
      ForEach(0..<workouts.count) { index in
        NavigationLink(destination: WorkoutSetupView(workout: workouts[index], action: {
          self.showingSetup[index] = false
        }), isActive: $showingSetup[index]) {
          WorkoutCellView(workout: workouts[index])
        }
      }
    }
  }
}
This works, but it isn't great because setting any value in showingSetup changes the entire array, and so it's probably causing the SwiftUI renderer to check the entire view tree instead of just the part that is really changing.
But, there is better way.
Using NavigationLink tags
The other way to pass a binding to NavigationLink is called a tag. To use it, you need a unique Hashable value for each NavigationLink. We conveniently have the workout's id property.
Then, you declare a single @State variable that you set to the value of the tag to show (if any). If no subview is shown, it is set to nil.
The tag will be set automatically by you tapping the link or back button, but you can also set it yourself.
Here's how you use it in our example:
struct WorkoutView: View {
  @State var tagToShow: String?

  var body: some View {
    List {
      ForEach(workouts) { workout in
        NavigationLink(destination: WorkoutSetupView(workout: workout, action: {
          self.tagToShow = nil
        }), tag: workout.id, selection: $tagToShow) {
          WorkoutCellView(workout: workout)
        }
      }
    }
  }
}
Another way that would have worked well is to put the NavigationLink inside the WorkoutCellView. That way each would have its own state variable.
As an exercise, try to do that.
In the next article we'll talk about a different kind of navigation, page based, which is also common on the watch.
Subscribe to be notified of the next WatchKit article
Make sure to sign up to my newsletter to get notified when a new article is published.
Contact me if you are working on a Watch app and need help.
Next Article: How to develop page based navigation UI on Apple Watch