How to use NavigationLink in a SwiftUI Watch App
Creating List/Detail Views
by
 Lou Franco
In iOS, we use UINavigationViewController from UIKit to create a hierarchical navigation structure. Using it, we can push views onto the view controller stack, and we automatically get a back button to take us back.
UIKit and this class are not available to Apple watch developers, and so before SwiftUI, watch app developers used WKInterfaceController's pushController method and Storyboards (Apple docs).
Luckily, this is easier in SwiftUI, and now the same code works on iOS and watchOS.
Hierarchical Navigation in a watchOS App
Hierarchical navigation is used in many watch apps. For example, in the Workouts app, we start with a list of workouts and can progress to detail screens to set it up:
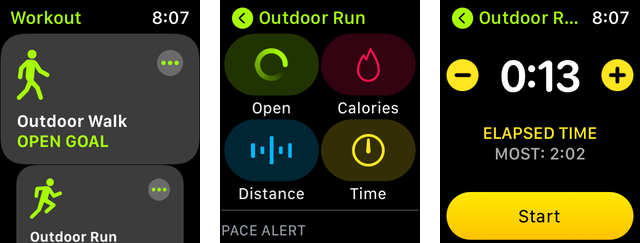
Each subsequent screen gets a back button.
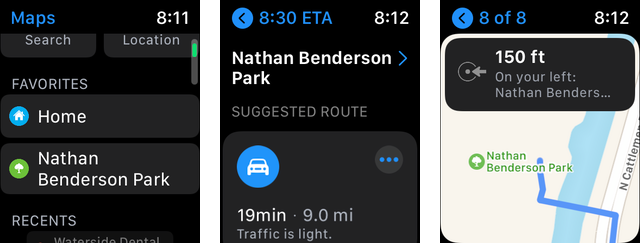
It's also used in Maps
And also in Messages, Mail, Phone, Podcasts, Reminders (and a bunch of others)
In SwiftUI, we get that functionality with NavigationLink. Let's try to recreate the Workouts app views and navigation.
The Workouts models
To keep it simple, we'll use the built-in symbol images for workouts. Here's a Workout struct we can use:
struct Workout: Identifiable {
  var id: String { name }
  let name: String
  let symbolName: String
}
Since we intend this to be in a ForEach to populate a List, the struct must implement Identifiable, which means that each value in the array must have a unique id. We will make sure name is unique and use that.
Here's an array we can use for the view.
let workouts = [
  Workout(name: "Outdoor Walk", symbolName: "figure.walk"),
  Workout(name: "Outdoor Bike", symbolName: "bicycle"),
]
Create a workout cell view for the workout
To build the first screen, let's start with a view that represents a single workout. At a minimum we can do this:
struct WorkoutCellView: View {
  let workout: Workout

  var body: some View {
    VStack {
      Image(systemName: workout.symbolName)
      Text(workout.name)
    }
  }
}
Starting with that, let's see if we can get closer to the design of the real app.
If you want to try it:
- Add a new SwiftUI view to your project (File > New > File... > SwiftUI View) named
WorkoutCellView - Use the code above for the view and change the generated
WorkoutCellView_Previewsto
    struct WorkoutCellView_Previews: PreviewProvider {
      static var previews: some View {
        WorkoutCellView(workout: workouts[0])
      }
    }
You should now see the simple view in the preview pane (remember CMD-OPT-P)
Then:
- To set the size of the
Imageuse theresizable,aspectRatio, andframemodifiers - If we put the
Imagein anHStack, then we can add anImagewith the "ellipsis.circle.fill" symbol to the right of it.
Try to make it look like this:
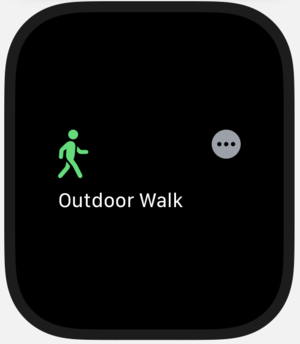
Here's how I did it:
struct WorkoutCellView: View {
  let workout: Workout
  var body: some View {
    VStack (alignment: .leading, spacing: 8) {
      HStack(alignment: .top) {
        // The workout symbol
        Image(systemName: workout.symbolName)
          .resizable()
          .aspectRatio(contentMode: .fit)
          .frame(width: 96, height: 40, alignment: .leading)
          .foregroundColor(.green)
        Spacer()
        // The ellipsis
        Image(systemName: "ellipsis.circle.fill")
          .resizable()
          .frame(width: 24, height: 24)
          .foregroundColor(.gray)
      }
      // The name of the workout
      Text(workout.name)
    }
    .padding(16)
  }
}
Now, we can use that to populate a List
Using List and ForEach in SwiftUI
We have a simple struct, Workout, a workouts array of them, and WorkoutCellView, which can render it. Making a list of those in a view is simple now.
If we add this code:
struct WorkoutView: View {
  var body: some View {
    List {
      ForEach(workouts) { workout in
        WorkoutCellView(workout: workout)
      }
    }
  }
}
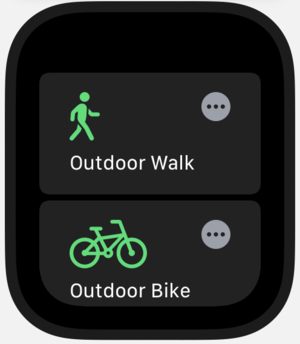
We'll get this in the preview pane:
Since we just want to show navigation, to keep it simple, let's use this view as the target view.
struct WorkoutSetupView: View {
  let workout: Workout

  var body: some View {
    Text(workout.name)
  }
}
This lets us know that we're passing the right workout value through the view.
Adding a NavigationLink
Now, we can finally add in the navigation. For default behavior, we just need to wrap our cell view in a NavigationLink
struct WorkoutView: View {
  var body: some View {
    List {
      ForEach(workouts) { workout in
        NavigationLink(destination: WorkoutSetupView(workout: workout)) {
          WorkoutCellView(workout: workout)
        }
      }
    }
  }
}
If you use the little play button at the top of the watch preview, you can test interaction. It looks like this:
Using this code, we get an automatic back button at the top of the setup view. However, it's sometimes necessary to navigate back to the previous view based on user interaction.
In the next article, we'll look at programmatic navigation with NavigationLink.
Subscribe to be notified of the next WatchKit article
Make sure to sign up to my newsletter to get notified when a new article is published.
Contact me if you are working on a Watch app and need help.
Next Article: Programmatic Navigation with NavigationLink on an Apple Watch