Apple Watch SwiftUI App Tutorial: Creating the Project
Xcode has a template that does all of the work, but let's look at what it did
by
 Lou Franco
This tutorial will use Xcode to make a minimal Apple Watch app. Then we'll explore the files it made and play around with SwiftUI and the Xcode SwiftUI Preview Canvas.
Prerequisites
- Download and install Xcode (at least 12.4)
- Basic Swift Language knowledge
In this article and all of the future ones, I will tell you everything you need to know about SwiftUI, HealthKit, Workouts, CoreLocation, and anything else that we'll use.
If you want to be notified of future articles, subscribe to my newsletter.
Create a minimal Apple Watch app from an Xcode template
Xcode has project templates that will get a basic watch app running. Here are the detailed steps.
- Start Xcode
- Choose Create a new Xcode project from the start-up Wizard. If you are already running Xcode, then choose the File > New Project ... menu.
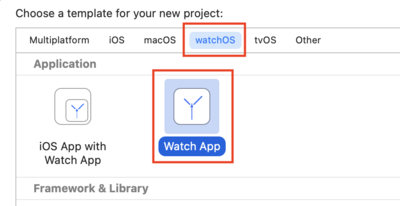
- Chose the watchOS segment at the top of the dialog and then the Watch App in the list below that.
- Click Next
- Fill out the next dialog
- Set the Product Name to AppOMatWatchWorkoutSample
- Choose your development team
- Set the Organization Identifier to your reverse domain. I use com.app-o-mat. If you do not own a domain, then use com.example.your-name for now.
- Set the Interface to SwiftUI
- Set the Life Cycle to SwiftUI App
- Set the Language to Swift
- Uncheck the Include Notification Scene checkbox
- Click Next
- Pick a folder. A project folder named AppOMatWatchWorkoutSample will be created in the folder you choose.
- Click Create
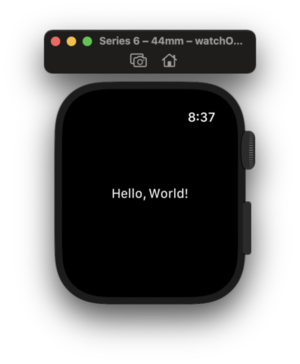
Xcode will create the project, code, and configuration files you need to get "Hello World" to show up on a watch.
Run the app in the watch simulator using CMD-R or by picking Product > Run from the menu.
Explore the project
There are several files that were created by the template. The important ones are:
ContentView.swift: The main SwiftUI view of the app.Info.plist: The app's basic configuration (version, display name, etc).Assets.xcassets: A bundle that stores your app's images and color palette.ComplicationController.swift: Code that implements your app's complication (those small app-specific views you can add to a watch face, like your activity circles or the date). Your complication also has its own assets bundle.Preview Content: A folder that holds assets that are used for your Xcode previews (and that are not used by the app when installed).
Updating SwiftUI and Using Xcode Previews
Choose ContentView.swift in the Project navigator. It should look like this:

The preview on the right is called the Canvas. You can toggle it on/off with OPT-CMD-ENTER or by choosing the Editor > Canvas menu.
Sometimes the canvas does not show the preview (It's a little flakey -- and it especially has trouble when you are editing code). You might need to click the Resume button on the Canvas if it has trouble showing.
You can also force a Canvas reset with OPT-CMD-P or Editor > Canvas > Refresh Canvas.
After a while, you will get used to to tapping OPT-CMD-P every time you get a good build.
Let's play with SwiftUI
We're going to focus on the SwiftUI code in the ContentView.swift file. So, just these lines:
struct ContentView: View {
    var body: some View {
        Text("Hello, World!")
            .padding()
    }
}
Here are some exercises. If the Canvas doesn't show your changes, remember OPT-CMD-P
- Change
"Hello, World!"to some other text. - Add
.foregroundColor(.blue)right below theText - Add
.border(Color.red, width: 3)right above.padding() - Now move the border to right below the padding and note the difference (we'll learn more about this later)
Subscribe to be notified of the next WatchKit article
If you know any SwiftUI, it will work on a watch pretty much the same as it does on an iPhone. We'll get into this more in the next article.
Make sure to sign up to my newsletter to get notified when a new article is published.
Contact me if you need help with this tutorial.
Next Article: Apple Watch App SwiftUI Simple Example Views